
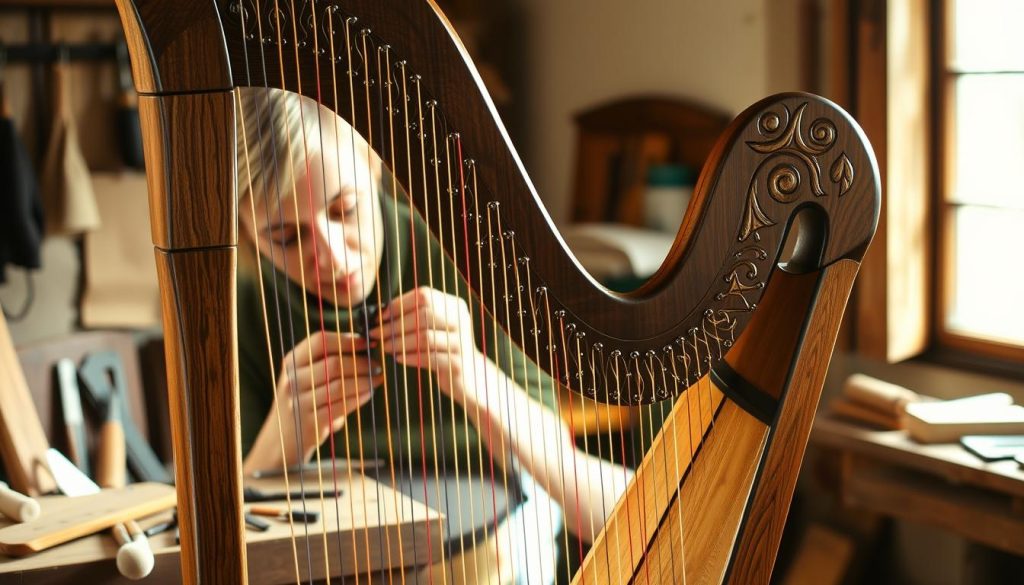
Creating a string instrument such as the Celtic harp requires patience and craftsmanship. Every stage, from choosing the wood to final assembly, shapes its tone. Makers combine ancestral techniques with modern innovations to achieve a unique result.
The wood used must be both strong and lightweight. Spruce and maple are often favored for their acoustic qualities. Precise cutting and sanding guarantee beautiful resonance.
The strings, made of nylon or metal, are tensioned with care. Poorly calculated tension can alter the sound. Some luthiers reinforce the structure with epoxy resin for greater durability.
Laser engraving now makes it possible to create precise patterns without compromising authenticity. These details turn each piece into a work of art.
Introduction to the Art of Celtic Harp Making
For centuries, the harp has enchanted listeners with its melodies and rich history. Originating in medieval Europe, this instrument has evolved alongside lutherie techniques. Jeremy H. Brown’s book, translated by Didier Saimpaul, describes this transformation in detail.
Today, makers combine ancestral know-how with modern tools. Their mission? To preserve a heritage while continuing to innovate. Some even use software to design unique models.
One amateur luthier says: “I started with traditional methods, then incorporated laser engraving.” This hybrid approach allows for precise work without losing the soul of the instrument.
For beginners, platforms such as Harpomania offer detailed guides. These resources are essential for mastering every step.
Finally, the quality of the harp directly influences musical interpretation. A good balance between craftsmanship and acoustics is essential for producing pure notes.
Choosing Materials: Wood and Strings
Choosing the right materials is crucial for shaping an exceptional tone. Each element influences the instrument’s resonance and durability. Makers favor fine woods and suitable strings to achieve perfect balance.
Ideal Wood Species for Resonance
Sycamore maple and walnut are often selected for their acoustic properties. Maple adds brightness in the treble, while walnut brings warm bass tones.
Oak, being denser, is reserved for structural reinforcements. Boards that are initially 27 mm thick are planed down to 7 mm for optimal finesse.
Types of Strings: Nylon or Gut
Nylon strings are popular for their strength and stability. They suit beginners and humid climates.
Natural gut, although fragile, offers unmatched sonic authenticity. Lengths range from 127 to 1021 mm for progressive spacing.
Suppliers such as Maderas Barber or L’UNISSON offer quality materials. Cross-graining in veneers strengthens the structure without weighing down the instrument.
Preparing the String Plan
The precision of the string plan determines the instrument’s sound quality. An error of just a few millimeters can alter the balance of tension and the accuracy of the notes.
Calculating Lengths and Spacing
String lengths range from 127 to 1021 mm for progressive tuning. Spacing of 13 to 18 mm between each string is recommended depending on its position.
| Range | Length (mm) | Spacing (mm) |
|---|---|---|
| Treble | 127-300 | 13-15 |
| Midrange | 301-700 | 15-17 |
| Bass | 701-1021 | 17-18 |
Makers use software such as Inkscape to model the curves. “A laser-cut template made from 6 mm MDF ensures repeatability”, explains a Breton luthier.
Optimal Soundboard Angle
The ideal inclination of the soundboard is 30 degrees. This angle promotes sound projection without making the body excessively rigid.
Avoid:
- Excessive tension on the bass strings.
- Poorly placed reinforcements that dampen resonance.
Making the Neck
The neck is the instrument’s structural heart. It supports the tension of the strings and transmits vibrations to the soundbox. Its making requires millimeter precision.
Cutting and Assembling the Wood Laminations
Makers use a three-ply perpendicular assembly (15 + 20 + 15 mm). This technique increases strength without weighing down the structure. Species such as maple or walnut are preferred.
| Layer | Thickness (mm) | Grain Orientation |
|---|---|---|
| Outer | 15 | Longitudinal |
| Central | 20 | Transverse |
| Inner | 15 | Longitudinal |
A copy-routing bit is used to sculpt complex curves. “An industrial band saw is essential for straight cuts”, notes an experienced luthier.
Reinforcements to Withstand Tension
Carbon sheets are integrated between the laminations to counter bending. Critical points, such as the tuning pins, receive an oak insert.
- Structural epoxy colors the joints without altering the tone.
- The adjustable scroll uses oblong dowels for fine adjustment.
These technical details ensure maximum durability, even under high tension.
Building the Soundbox
The soundbox brings the harp‘s notes to life. Its shape and materials directly influence the depth and clarity of the sound. Makers combine plywood and reinforcements to achieve perfect balance.
Pyramidal Shape and Variable Thicknesses
18 mm plywood is sculpted into a pyramid to amplify the bass. The walls gradually become thinner:
| Area | Thickness (mm) | Acoustic Effect |
|---|---|---|
| Base | 18 | Bass resonance |
| Middle | 12 | Midrange balance |
| Top | 8 | Treble projection |
“Aluminum templates guide the cutting of complex angles”, says a Lyon-based luthier. The ribs, steam-bent, follow the form without cracking.
Soundholes and Acoustic Optimization
The soundholes positioned on the soundboard release frequencies. If they are too large, they weaken the bass; if too small, they choke the treble.
- A fiberglass and resin coating reinforces the edges without adding unnecessary weight.
- Drilled internal braces reduce mass while stabilizing the structure.
This final stage ensures even projection, even in large halls.
Making the Technical Components
Precise and robust mechanical components ensure the instrument’s longevity. Their meticulous workmanship directly influences the stability and accuracy of each note.
Creating Custom String Nuts
Aluminum nuts, machined on a wood lathe, guide the strings without damaging them. One luthier says: “Making all 34 pieces yourself saves 40% of the cost while keeping control over quality.”
Copper guides limit drilling depth to within 0.5 mm. This precision prevents cracks while guaranteeing perfect alignment.
Drilling the Tuning Pins
The holes must fit each pin perfectly. L’UNISSON’s specialized reamers allow adjustments to one tenth of a millimeter.
| Material | Advantages | Disadvantages |
|---|---|---|
| Aluminum | Lightweight, resistant to oxidation | Less durable than brass |
| Brass | Greater longevity | Additional weight |
The parallel alignment of the nuts is checked with a laser level. A misalignment of 1 degree can throw an entire octave out of tune.
Final Assembly and Adjustments
Assembling a harp requires patience and rigor to achieve the best result. This phase turns individual parts into a functional instrument. Every gesture affects tone and longevity.
Gluing the Different Parts
The assembly begins with the neck, followed by the pillar, then the body. Structural epoxy provides a solid bond while allowing careful adjustment.
Adjustable straps hold the parts in place while they dry. “Overly forceful clamping can deform the wood”, an experienced luthier reminds us. Mechanical stresses are monitored using laser levels.
Gradually Bringing the Strings Up to Tension
The strings are installed in stages over several days. This method prevents sudden overtensioning that could damage the structure.
- Initial tuning at half tension to stabilize the instrument.
- Daily checks for misalignment with a caliper.
- Final adjustment after 72 hours for perfect tuning accuracy.
Time is a valuable ally. It allows the wood to adapt naturally to the forces at play. The final touch-ups ensure harmony between aesthetics and acoustics.
Finishing and Decoration
The final touch transforms the instrument into a unique work of art. It combines material protection with artistic expression, marking the culmination of the luthier’s work.
Varnishing and Protecting the Wood
Polyurethane varnish provides a robust barrier against humidity. More technical, antique wax penetrates the fibers for protection that is both deep and natural.
Two methods coexist:
- Brush application for precise control of each coat.
- Spraying for an ultra-smooth, even finish.
Artistic Personalization
Pyrography makes it possible to inscribe historic Celtic motifs with extreme precision. Some makers combine maple and walnut to create contrasting inlays.
Decorative options include:
- Marquetry inspired by medieval manuscripts.
- A laser-engraved logo with traditional Breton patterns.
- Translucent coatings that highlight the wood grain.
“Every detail tells a story”, emphasizes a Rennes-based craftsperson. These visual elements harmoniously complement the instrument’s tone.
Conclusion: From Craftsmanship to Music
Moving from raw wood to melody is a unique adventure. Every instrument tells a story of patience and know-how, as shown by its use at the Dinan festival.
This project teaches precision and listening. Meeting experts such as Patrick Le Boulge inspires makers to push their limits. Some are already considering pedal models.
Share your creations at craft gatherings. Also explore the rich musical repertoire associated with the Celtic harp. Making the instrument is only the beginning; music is your legacy.